| |
| |
Mastering
3D Studio MAX R3 |
Mapping the
Roof
The front section of the house still needs the roof mapping applied with
proper orientation.
- 1. Return to the top of the modifier stack and apply
a Mesh Select modifier.
- 2. Go to the Polygon sub-object level.
- 3. In the top viewport, Ctrl-click both visible
polygons on HouseShape01. These should be the two roof polygons, as
seen in the perspective viewport(s).
- 4. Apply a Material modifier and set the ID to 3.
- 5. Apply a UVW Map modifier with Planar mapping
along the Y axis.
- 6. Enter the Sub-Object level of the UVW Map modifier.
- 7. Rotate the gizmo 90 degrees in the World Z axis.
- 8. Click Fit, exit the Sub-Object level, and deselect
the house by clicking anywhere off the object in a viewport.
The front section of the house is complete. You should now have a scene
matching the file House04.max from the CD. Take a moment
to examine the modifier stack for HouseShape01 at this stage.
- 9. Select the object HouseShape02.
- 10. Apply a Mesh Select modifier and choose Polygon
as the sub-object level.
- 11. In a perspective viewport, click the long, front
polygon of the rear section of the house. (This is the side of the house
that currently has a roof material mapped to it; see Figure 4.28.)
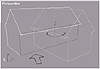
FIGURE
4.28 The modifier stack after mapping the
windows
- 12. Apply a Material modifier with an ID value of
2.
- 13. Apply a UVW Map modifier of Planar type and
with X axis alignment.
- 14. Click Fit.
- 15. Go to the Sub-Object level of the UVW Map modifier
and, using the Select and Non-Uniform Scale tool, scale the mapping
gizmo along the X axis down to 35 percent.
- 16. At this point, you should take the time to go
back and rename the modifiers for HouseShape02. Save or hold the scene.
- 17. Return to the top of the stack for the object
HouseShape02. Once again, apply a Mesh Select and choose Polygon as
the sub-object level.
- 18. While holding down the Ctrl key, click the two,
tall end polygons of the back section of the house (you might have to
do this in two different perspective viewports).
- 19. Apply a Material modifier with an ID of 4. You
should now have something like Figure 4.29.
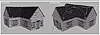
FIGURE
4.29 You should now have windows on all
the short walls of the house.
- 20. In the Polygon sub-object level, apply a Mesh
Select and select both of the roof polygons using the Ctrl key.
- 21. Apply a UVW Mapping modifier. Select Planar
as the method.
- 22. Rotate the gizmo 90 degrees.
- 23. Click the Fit button.
- 24. Increase U tiles to 1.5 in the Mapping Parameter
rollout.
- 25. Arc Rotate around to the backside of the house.
Apply a Mesh Select and select the last polygon (the rear wall of the
house).
- 26. Add a Material modifier with an ID value of
5.
- 27. Apply a Planar type UVW Mapping modifier with
Z axis alignment.
The house is now complete, and after renaming the modifier stack of HouseShape02,
you should have a finished house, as seen in the file House05.max.
Again, you may want to take some time to examine the modifier stacks of
the two objects present in the scene. The stacks may seem long for the
“simple” resulting model, but keep in mind that every edit and
every parameter performed to these original shapes can be “gone back
to” in the stack at any time and altered.
Once the decision has been made that the house is complete and you will
be putting it into a game engine, you would first collapse the stack and
save a version of the house that has a name like “House01-collapsed.max”.
All the mapping and UVW coordinates will remain, but the overhead of the
modifier stack will be eliminated.
There is also a great feature in MAX called Polygon Counter under the
Utility tab. This will bring up a floater that counts the polygons of
both the current selection and the entire scene. This is good if you know
the target maximum you are “allowed” to have for a specific
game platform.
Summary
Modeling with solid objects is only one way to create complex models
in MAX. Now that you have completed this chapter, you should have a deeper
understanding of how to put these types of objects to work for you. Additionally,
you should be able to comprehend some of the direct benefits of both types
of solid geometry—modifiers and compound objects. Finally, you should
be well on your way to comfortably experimenting with this type of modeling.
Finding the balance between speed, complexity of the mesh (face counts),
and levels of detail (accuracy) is almost an art unto itself. As your
experience with the program grows, your ability to delineate which method
to use (solid or spline modeling) will improve. In the next chapter, we
will explore organic modeling.
© 2000, Frol (selection,
edition, publication)
|
|
)
)
)