| |
| |
Mastering
3D Studio MAX R3 |
Let’s animate a Bend modifier:
- 1. Open your anim_box.max file with
the animated box.
- 2. Select the box and apply a Bend modifier.
- 3. Turn on the Animate button and go to frame 30.
- 4. Turn up the Angle parameter on the bend to 45Ў.
- 5. Turn off the Animate button and play the animation.
The box bends for the first 30 frames as it is moving.
Notice, as in Figure 6.9, that the box doesn’t bend very smoothly.
This is because we didn’t give it enough segments in height—a
curve with only three segments (in this case, the left edge) is not smooth.
Let’s fix this.
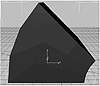
FIGURE
6.9 This box has too few segments for a smooth
bend.
Navigating the Modifier Stack
When animating, as when modeling, it is sometimes necessary to navigate
the modifier stack to change values lower in the stack. In this case,
we need to go to the Box level to change the number of height segments.
- 1. Select the box and go to its modifier stack in
the Modify tab.
- 2. Click the button at the right to reveal the modifier
stack drop-down list and select Box.
- 3. Turn the number of height segments up to 8 and
play the animation. The bend is much smoother now.
- 4. For the next section we need a lot of segments,
so turn up all the segment counts (length, width, and height) to 12.
- 5. Go back up to the top of the stack (the bend
modifier) and save the file.
|
|
|

| TIP When a twisting or bending
modifier doesn’t seem to do anything, check that you have enough
segments. One segment can’t bend.
|
Animating a Space Warp
Space warps also have parameters that can be animated. Let’s set
a Ripple space warp in the path of our box and animate its amplitude over
time.
|
|
|

| NOTE For a space warp like
Ripple to have a visible effect, the object it’s affecting needs
plenty of vertices. You created more vertices when you increased the
number of segments in the last exercise.
|
|
| 1. In the same animated
box file, create a Ripple space warp big enough to cover the middle
part of the box’s trajectory.
|

| 2. Click the Bind to Space Warp
button and drag from the box to the space warp. Click one of the select
tools to turn off the Bind to Space Warp button.
|
|
| 3. Set Amplitudes 1 and 2 of the
ripple to 0.
|
|
| 4. Go to frame 75 and turn on the
Animate button.
|
|
| 5. Turn up Amplitude 1 of the ripple
to 80.
|
|
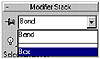
| 6. Turn off the Animate button
and play the animation. The amplitude of the space warp increases
over 75 frames. In the middle of the animation, your file should look
about like Figure 6.10.
|
|
| 7. Save the file as anim_box.max;
we’ll use again later in this chapter. You can view the final
results of the exercises in this chapter by opening the anim_box.max
that’s on the CD-ROM.
|

FIGURE
6.10 The effect of animated Ripple on our box
Animating a Light
Lights also have parameters that can be animated to create a sense of
mood. An example of this is a scene in the movie Toy Story after
Buzz Lightyear is confronted with the fact that he is a toy. Over the
course of his song, the lighting on his face changes subtly from blue
(when he is depressed) to orange (as he pulls himself out of it). Let’s
animate the multiplier and color values of a light.
- 1. Reset MAX.
- 2. Create a target spotlight from the upper-right
corner of the front view, dragging the target to the middle of the viewport.
- 3. Create a sphere in the middle of the hotspot
of the light. You can use the spotlight view (keyboard shortcut Shift+4)
to do this.
- 4. Select the light and go to the Modify tab.
- 5. Go to frame 100 and turn on the Animate button.
- 6. Change the spotlight color from white to red.
Play the animation. The color of the light on the ball animates from
white to red.
- 7. Stop the animation and go to frame 30. Turn the
multiplier of the light up to 2.2.
- 8. Go to frame 100 and set the multiplier to 0.5.
- 9. Turn off the Animate button and play the animation.
The light becomes brighter until frame 30 and then diminishes.
Animating a Material
Many material parameters can be animated. For example, animating the
opacity changes an object’s transparency to the camera, and animating
a bump map can change the appearance of textures over time. In this example,
you are going to animate something that you can watch in the viewport:
the tiling of a checker map.
|
| 1. Reset MAX.
|
|
| 2. Create a teapot and click the
Zoom Extents Selected button.
|
|
| 3. With the teapot still selected,
click the Material Editor button.
|
|
| 4. Click Assign Material to Selection
button.
|
|
| 5. Under the Blinn Basic Parameters
rollout, click the button next to the Diffuse color swatch.
|
|
| 6. Choose Checker from the Material/Map
Browser.
|

| 7. Click the Show Map in Viewport
button.
|
|
| 8. Go to frame 100 and turn on
the Animate button.
|
|
| 9. Change the U and V tiling of
the checker map to 5.
|
|
| 10. Close the Material Editor,
turn off the Animate button, and play the animation. The checker pattern
animates from a large to a small check.
|
© 2000, Frol (selection,
edition, publication)
|
|
)
)
)
)
)